
Knits that Fit
It is relatively unusual for me to hand knit something without the need to make some minor adjustment to sleeve or body length. But just lately I seem to have had to make a variety of other adjustments and I thought it might be helpful to share some of how I tackled a couple of recent projects.
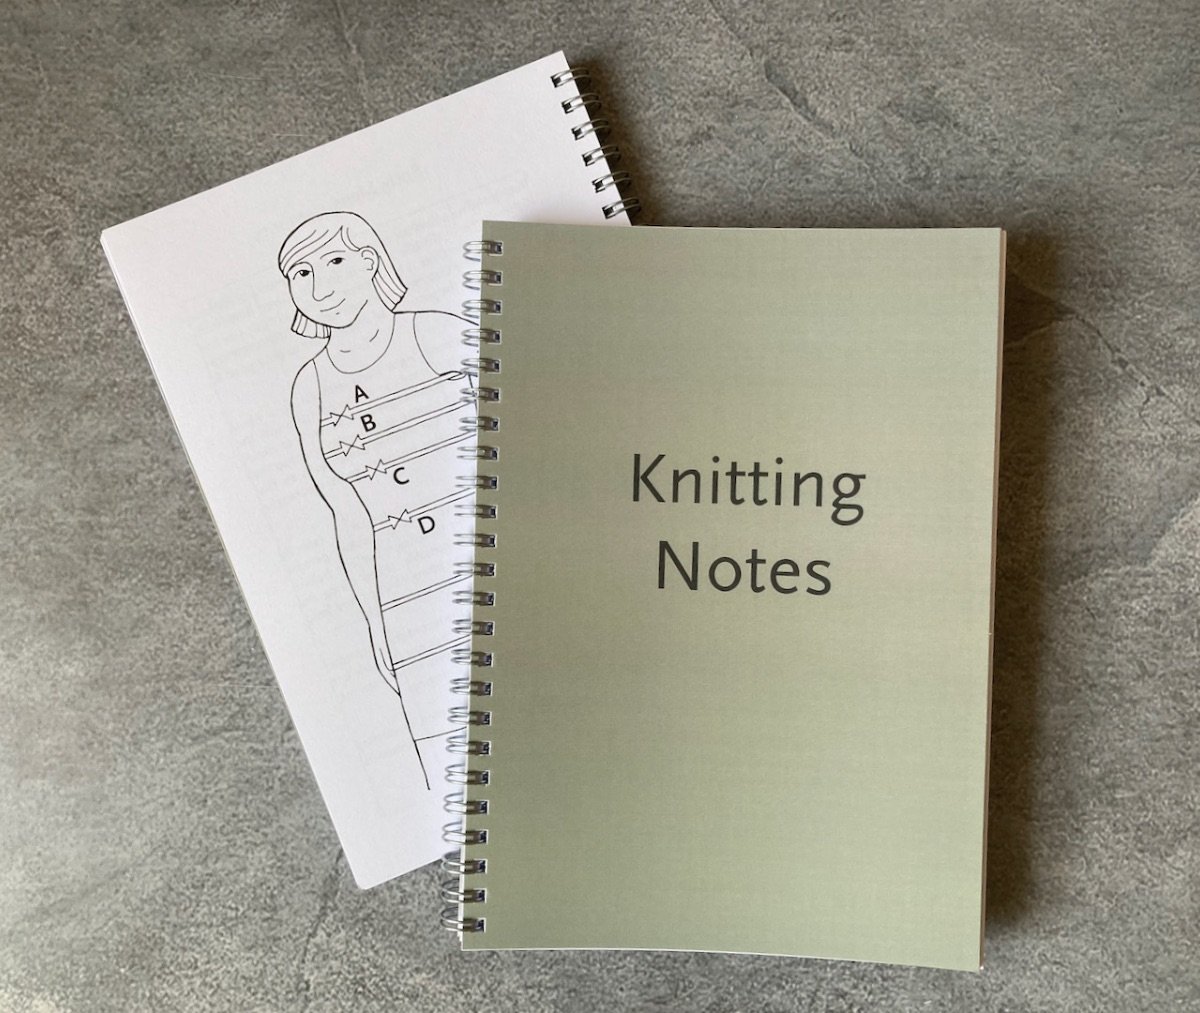
Achieving a good fit is mostly about good preparation. And before you even start with wool and needles, you need to know your body measurements (or those of the person you are knitting for). Exactly which dimensions you need will depend a bit on what you are making but at the very least you need to know the circumference of your chest, hips and upper arm and the length of your arms and back. If you want to keep a record of these and get more details about where to take measurements from, there are detailed drawings in my Knitting Notes knitter's journal (currently on offer!). If taking good measurements is tricky for any reason, measure a well fitting garment. It's not quite as good an option but better than nothing.

Once you know the dimensions you are aiming at, take a very close look at the pattern data and schematic (a table, or preferably diagram, of finished measurements which all good patterns should have). Decide which finished garment size will work best for you, taking into account how much ease you like (i.e. how much larger than your body size you want the garment to be).
Next, check the recommended gauge. If you want your garment to be the correct finished size, getting gauge is essential. Each time we knit a garment, we are trying to match our gauge to the designer's gauge, and they are as variable as we are when it comes to how tightly or loosely they knit.
Gauge is not a matter of right and wrong. It is individual, like our handwriting, and hard to change to order. I am a relatively tight knitter and if the designer happens to knit a little more loosely then I am going to have to adjust something to make this design work for me. Add a change of yarn from the one the designer used into the mix and I have yet another variable to contend with.

This is where swatching comes in. We are often tempted to skip this preparatory step in our enthusiasm to get started but please, please don't!
A difference of even one stitch per 10cm can result in a garment that is inches bigger or smaller in circumference than you hoped it would be.
To make sure that your swatch does its job please:
Make the swatch big enough. If the gauge is 26 stitches x 42 rows then cast on at least 36 stitches and knit 50 rows so that you are not trying to measure right up to the edge of your swatch. Edge stitches curl and distort and will make your measurement inaccurate.
Do to the swatch what you will do to the finished garment i.e. wet block the swatch and let it dry before measuring.
Mark out the area you are going to measure accurately with pins or a swatch gauge.
If the gauge isn't right, change your needle size and make another one. If you have too many stitches per 10cm, go up a needle size. If you have too few stitches per 10cm, go down a needle size.
Don't forget to check that you like the fabric you are producing - if it is too dense or open at the recommended gauge, then you may need to rethink either the pattern or the yarn choice.
Trust me, it is worth it...
Let's now suppose that I have done all that and, as happens fairly often to me, I achieve stitch gauge with a needle change but not row gauge i.e. my 10cm square of knitting has the right number of stitches from side to side but I still have too many rows from top to bottom. All is not lost!
There are various ways you can deal with this depending on the type of construction you are faced with.
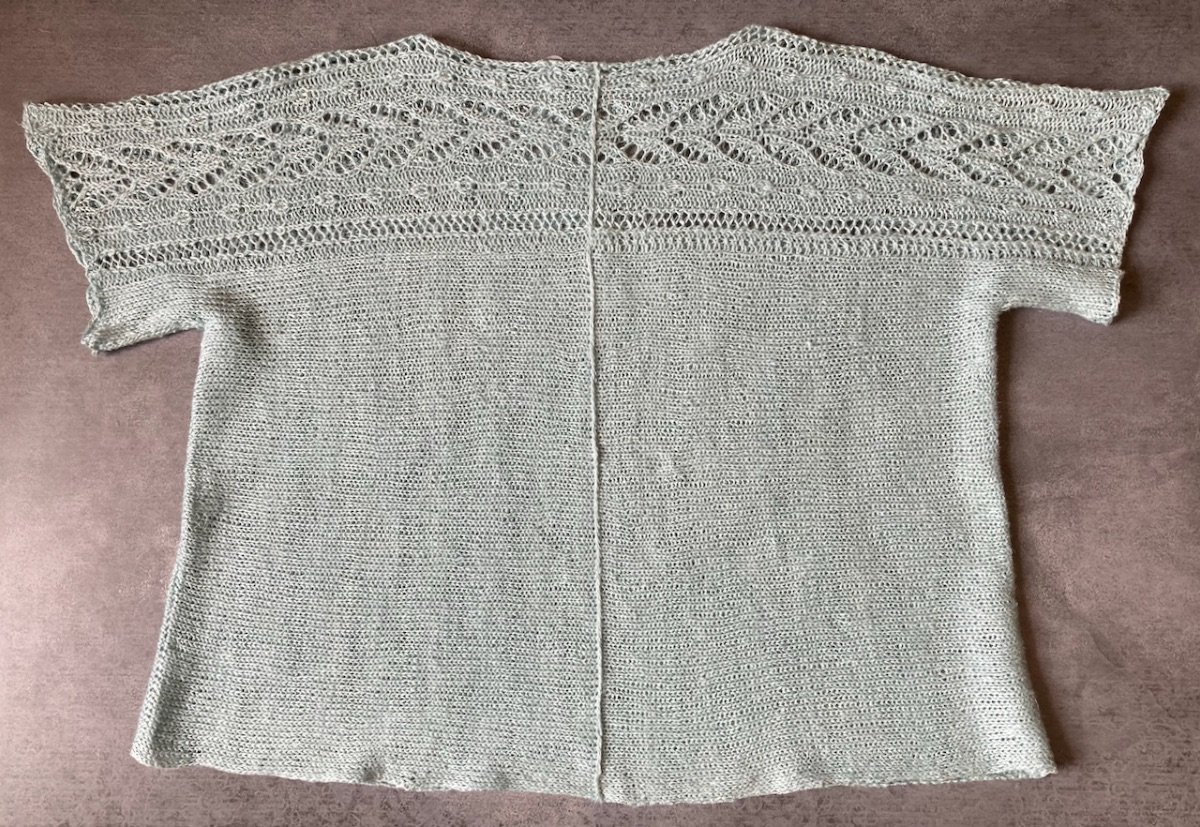
I have made a couple of tops using a sideways construction including the Bolan Tee (above) made in BC Garn Lino. This top is worked outwards from the centre back and centre front. In this instance, my problems with row gauge were easily solved by adding a 10 row pattern repeat to each of the 4 sections before casting off for the side seams.

But if I am working a top down yoke in the round, with raglan shaping, I need a different solution. Left is my Dessine-moi un Mouton pullover in Kinross 4ply. When I had finished the raglan increases, the yoke depth was too shallow, making the sweater too tight under the arms. The solution here was to add some extra rounds without increasing at the raglans before dividing the body and sleeves. As these extra rounds are disappearing under the arms they don't spoil the overall effect.
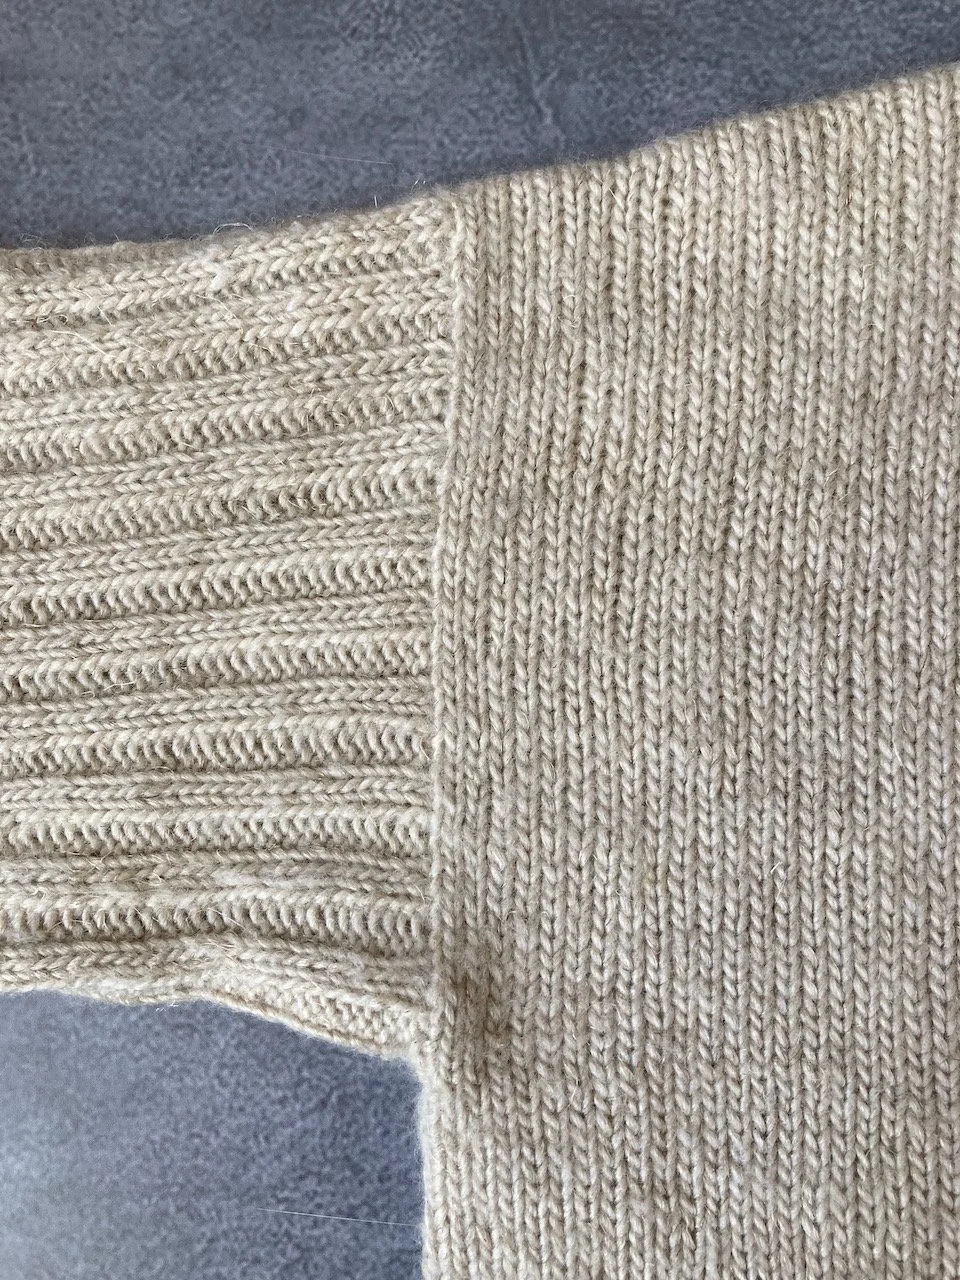
If I am knitting a sweater with drop shoulders, and straight sides all the way up, I can add more rows to reach the desired length before neck and shoulder shaping starts, which is what I did when I made my Blueprint Sweater in Manos Milo. But here the extra rows I had added to make up the length created a slightly different problem when I came to picking up stitches around the armhole.
My usual practice, when picking up stitches along the side edge of a piece of knitting, is to pick up a stitch from three out of every four rows. This formula generally gives me an even join between sleeve and body. But when I counted the rows around the armhole, it was clear that, thanks to the extra rows I had added to the body, picking up from 3 out of 4 rows would leave me with more stitches than the recommended number for my size. But it did give me the right number for the next size up! So I just switched sizes for the sleeves and accepted that they would be slightly more relaxed in fit.

Switching sizes for different parts of your garment might seem a bit daunting but it can work really well providing you think it out and mark up your pattern carefully to avoid confusion. My Bolan Tee above has the vertical dimensions (and cast on stitch count) of the 4th size, the pattern repeats of the 2nd size and the finished width of the 1st size! But it fits!