
Getting neater Cables

A while back I made the Oban Sweater by Thea Coleman. I have enjoyed making it, and I was particularly pleased with the stitch definition – just as well given how many cables there are in this design (yes, all over the back as well...).
There was an element of challenge in this project, though, so I thought I would share with you something I learnt while knitting this. Although I managed to work the honeycomb sections at the sides of the body pieces and sleeves without a cable needle – a first for me – my main learning point involved the rope cables.
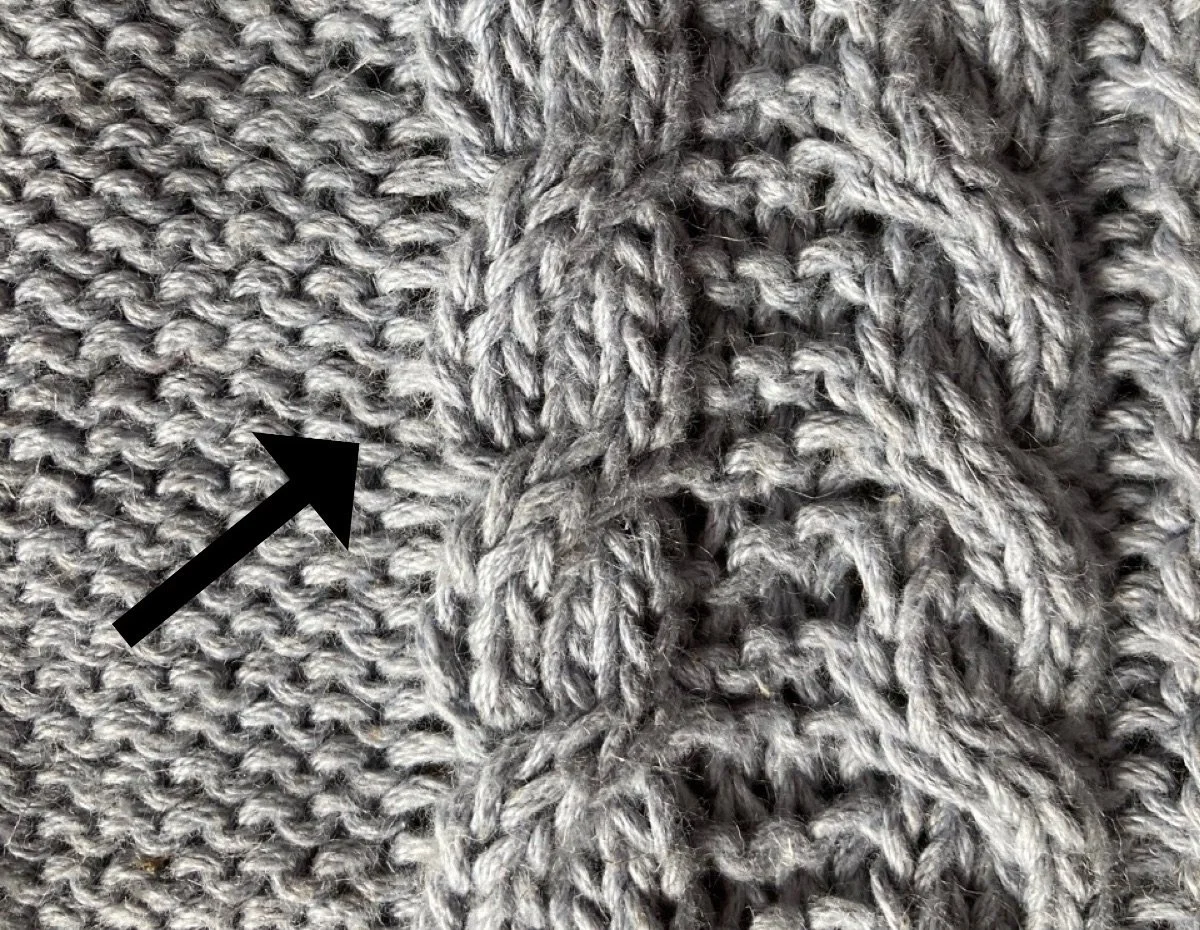
Have you ever found that when you work cables on a background of reverse stocking stitch, the last cable stitch looks loose, however much you try to pull the yarn tight? That was certainly a problem for me with this project and I wasn't happy with the way the edges of my first few cable pattern repeats looked.
These loose stitches happen because extra yarn is used when you bring the working yarn forward ready to make the first purl stitch.

This extra yarn tends to flow back into the last knit stitch of the cable. The fact that I was working with a cotton and linen yarn with no elasticity only tends to make the problem worse in this project.
The loose stitch is even more obvious on the reverse. But there is a way of limiting the problem.
When making a purl stitch, most of us wrap our yarn over the top of the right needle as in the picture above left. If, instead of doing this, we bring the yarn forward in the usual way but then up and around, as in the picture on the right, we use less yarn in making the purl stitch. This means there is less extra yarn to slip back into the last knit stitch and less unsightly looseness.
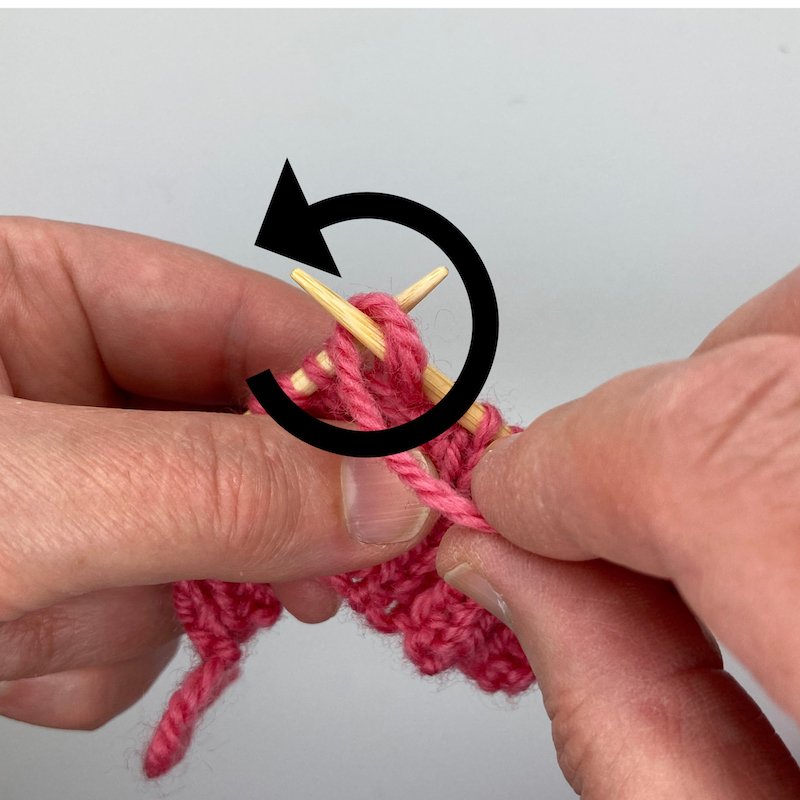
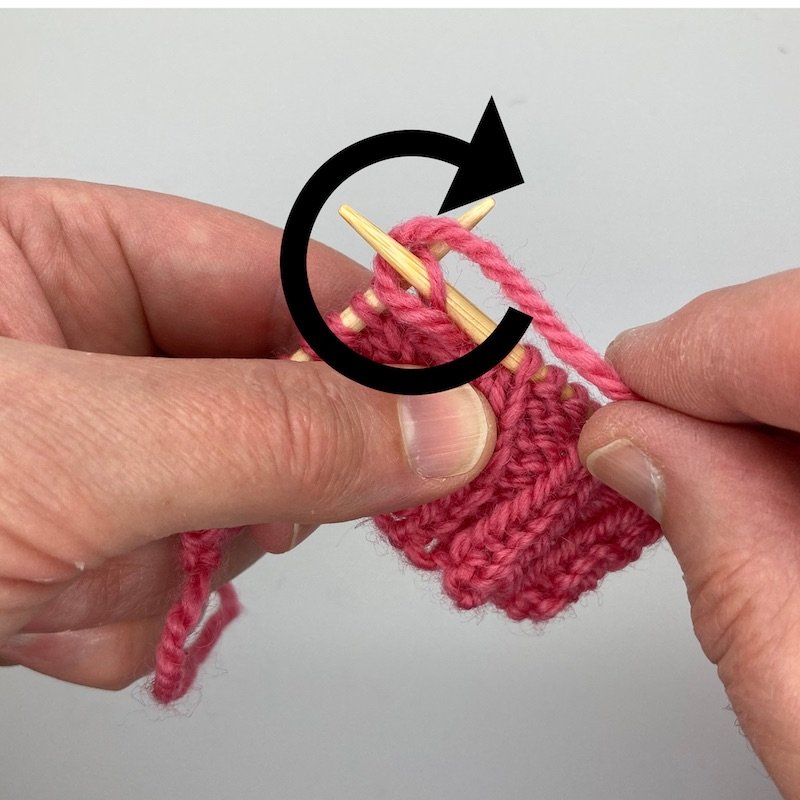
One downside of doing this is that the stitch created will be sitting the wrong way round on the needle but this can easily be corrected on the next row by knitting into the back of the stitch.

The other downside is that tightening up these first purl stitches will have implications for your gauge, particularly when you are using this technique repeatedly across the fabric, and so you need to use this method when you swatch.
My gauge was quite a bit tighter as a result of using this technique but, as I was happy with the fabric I was producing, I didn't increase the needle size, I just knitted the jumper in the next size up.

There are many more tips on working cables available in Arnall-Culliford Knitwear's little e-book Something New to Learn about Cables. You will find within clear photo tutorials, advice on fixing mistakes in your cables and three lovely projects to practice your new skills.
The companion volume Something New to Learn about Lace is also recommended.